Difference between revisions of "Component Details"
Hcraigmiller (talk | contribs) |
Hcraigmiller (talk | contribs) |
||
| Line 25: | Line 25: | ||
<p>[[File:Components.01.Assembly.png|frameless|280 px|Openrocket <i>components</i>.]]</p> | <p>[[File:Components.01.Assembly.png|frameless|280 px|Openrocket <i>components</i>.]]</p> | ||
| − | === Assembly Components Basics === | + | ==== Assembly Components Basics ==== |
| + | <table class="left" style="width:840px"> | ||
| + | <tr> | ||
| + | <th>What you see</th> | ||
| + | <th>What you do</th> | ||
| + | </tr> | ||
| + | <tr> | ||
| + | <td>'''[[File:Install_Windows_Prompt_01.png|left|frameless|180 px|center]]'''</td> | ||
| + | <td><p><b>Double-left-click on or open the installation file to run the installer</b> to start the <i>instal4j</i> installation wizard, displaying the progress of the file transfer.</p></td> | ||
| + | </tr> | ||
| + | <tr> | ||
| + | <td>'''[[File:Install_Windows_Prompt_02.png|left|frameless|180 px|center]]'''</td> | ||
| + | <td><p>After the file transfer is complete, a warning screen will appear asking for your permission to allow this application to make changes to your device. <u>To continue with the installation</u>, <b>left-click on the "Yes" button</b>.</p></td> | ||
| + | </tr> | ||
| + | <tr> | ||
| + | <td>'''[[File:Install_Windows_Prompt_03.png|left|frameless|180 px|center]]'''</td> | ||
| + | <td><p>The <i>Welcome</i> screen for the OpenRocket installation will then appear, giving you the option of choosing a different directory in which to save the OpenRocket files. <u>Unless you are familiar with directory structures</u>, you should <b>leave "Yes..." selected and left-click the "Next" button</b>.</p></td> | ||
| + | </tr> | ||
| + | <tr> | ||
| + | <td>'''[[File:Install_Windows_Prompt_04.png|left|frameless|180 px|center]]'''</td> | ||
| + | <td>The next step is to set the file extension associations. The "OpenRocket Rocket Files (*ork)" box should already be checked, so, <u>unless you want to change the file associations</u>, you can just <b>left-click the "Next" box</b>.</td> | ||
| + | </tr> | ||
| + | <tr> | ||
| + | <td>'''[[File:Install_Windows_Prompt_05.png|left|frameless|180 px|center]]'''</td> | ||
| + | <td>As the OpenRocket application is installed, the installation progress is displayed.</td> | ||
| + | </tr> | ||
| + | <tr> | ||
| + | <td>'''[[File:Install_Windows_Prompt_06.png|left|frameless|180 px|center]]'''</td> | ||
| + | <td>After the installation has finished, the final prompt appears, stating that OpenRocket can be launched by selecting the installed icons. <b>Left-click the "Finish" button</b> to return to the <i>Desktop</i></td> | ||
| + | </tr> | ||
| + | </table> | ||
{| border="2" style="margin-left: 2em" | {| border="2" style="margin-left: 2em" | ||
Revision as of 06:45, 23 February 2022
|
The current User's Guide is very much a work in progress, any help would be greatly appreciated! |
Overview
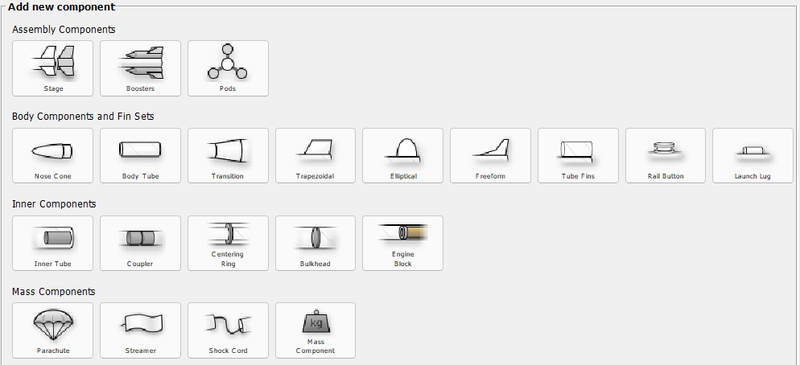
These are all of the components that you can expect to utilize when designing in OpenRocket, although individual components will be shaded until available for use with other compatible components.
Component Details -- OpenRocket 15.02
Component Classes
The components available in OpenRocket are divided into four classes based upon component function. These classes are assembly components, external components, internal components, and mass components (which include recovery components).
Assembly Components Class
The assembly class of components allows the user to create stages, boosters and pods.
Assembly Components Basics
| What you see | What you do |
|---|---|
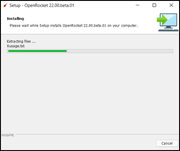
Double-left-click on or open the installation file to run the installer to start the instal4j installation wizard, displaying the progress of the file transfer. |
|
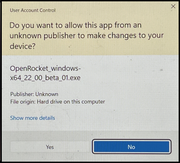
After the file transfer is complete, a warning screen will appear asking for your permission to allow this application to make changes to your device. To continue with the installation, left-click on the "Yes" button. |
|
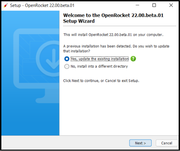
The Welcome screen for the OpenRocket installation will then appear, giving you the option of choosing a different directory in which to save the OpenRocket files. Unless you are familiar with directory structures, you should leave "Yes..." selected and left-click the "Next" button. |
|
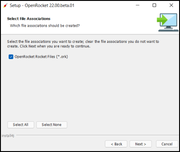
| The next step is to set the file extension associations. The "OpenRocket Rocket Files (*ork)" box should already be checked, so, unless you want to change the file associations, you can just left-click the "Next" box. | |
| As the OpenRocket application is installed, the installation progress is displayed. | |
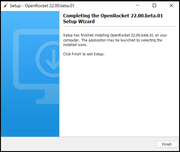
| After the installation has finished, the final prompt appears, stating that OpenRocket can be launched by selecting the installed icons. Left-click the "Finish" button to return to the Desktop |
| Nose Cone | It is possible to choose from different Nose cone types. |
| Body tube | The carcass and the rocket itself. Possible to chose different materials and thicknesses that affect densities and therefore weights of rocket. |
| Transition | |
| Launch lug | |
| Fins TrapezoidalElipticalFree form |
List/table/whatever of all the available component types, parameters and any limitations of each.
Body components and fins set
Inner components
| Inner tube | Inner tubes are usually used as motor mount. |
| Coupler | Tubes can be connected together using couplers. Couplers can also be used to make pistons. |
| Centering ring | |
| Bulkhead | |
| Engine block |
Mass objects
| Parachute | |
| Shock cord | |
| Streamer | |
| Mass component |
